Auth Server for Swift Server
This project is a workout app with a Swift backend built on Vapor and a SwiftUI iOS client. This article follows its authentication workflow end to end, from how the services are laid out to how the app signs a user in and keeps them signed in.
Architecture overview
The backend is a set of small Vapor services behind an Nginx gateway. The iOS app only ever talks to Nginx, which forwards each request to the right service based on its path.
                    ┌──────────────────────────┐
     iOS app ──────▶│          Nginx           │
                    │  forwards by path prefix │
                    └──┬──────────┬─────────┬──┘
                       │          │         │
       /api/auth/      │          │         │  /api/notifications/
       /api/user/      ▼          │         ▼
          ┌─────────────────┐     │   ┌─────────────────────┐
          │   AuthService   │     │   │ NotificationService │
          └─────────────────┘     │   │  email · push       │
                                  │   └─────────────────────┘
                   /api/workouts/ ▼
                    ┌───────────────────────┐
                    │ ContentDeliveryEngine │
                    └───────────────────────┘
- Nginx is the single entry point. It doesn’t contain any app logic. It routes
/api/auth/and/api/user/to AuthService,/api/workouts/to ContentDeliveryEngine and/api/notifications/to NotificationService. - AuthService owns user accounts: registration, email verification, login, password reset and Sign in with Apple. It issues the JWT access tokens and refresh tokens.
- ContentDeliveryEngine serves workout content and videos. It doesn’t store sessions. It checks the access token that AuthService issued on every request.
- NotificationService sends emails and push notifications. For example, AuthService calls it to email the verification code during signup.
The OpenAPI contract
Before any endpoint is written, it is described in a single openapi.yaml file (OpenAPI 3.0.1). The file is the contract between the server and the app. It lists every path, grouped by tags (Authorization, User, Workouts), the request and response bodies as shared schemas, and the two security schemes: basicAuth for login and bearerAuth for JWT-protected endpoints.
Here is the registration endpoint as an example. Every possible response, with its status code, is part of the contract:
/auth/register:
  post:
    operationId: register
    summary: User registration
    tags:
      - Authorization
    requestBody:
      required: true
      content:
        application/json:
          schema:
            type: object
            properties:
              name:
                type: string
              email:
                type: string
                format: email
              password:
                type: string
                minLength: 4
                maxLength: 8
              confirmPassword:
                type: string
            required: [name, email, password, confirmPassword]
    responses:
      '201':
        description: User created. A verification code has been emailed.
        content:
          application/json:
            schema:
              $ref: '#/components/schemas/User'
      '400':
        description: Invalid input or passwords did not match
      '409':
        description: This email is already registered
Two things are generated from this one file:
The iOS client code. Apple’s swift-openapi-generator runs as a build plugin in the Xcode project and turns the spec into a typed Swift
Client, plus a type for every request, response and schema. Its configuration is just:generate: - types - clientThe app never hand-writes a URL or a JSON model. If the spec changes, the client changes with the next build.
The API documentation, used to test the server. Importing the same
openapi.yamlinto Insomnia turns it into browsable documentation and a ready-made collection of requests. Each server endpoint can be called and checked against the contract as soon as it is written, before any iOS screen exists.
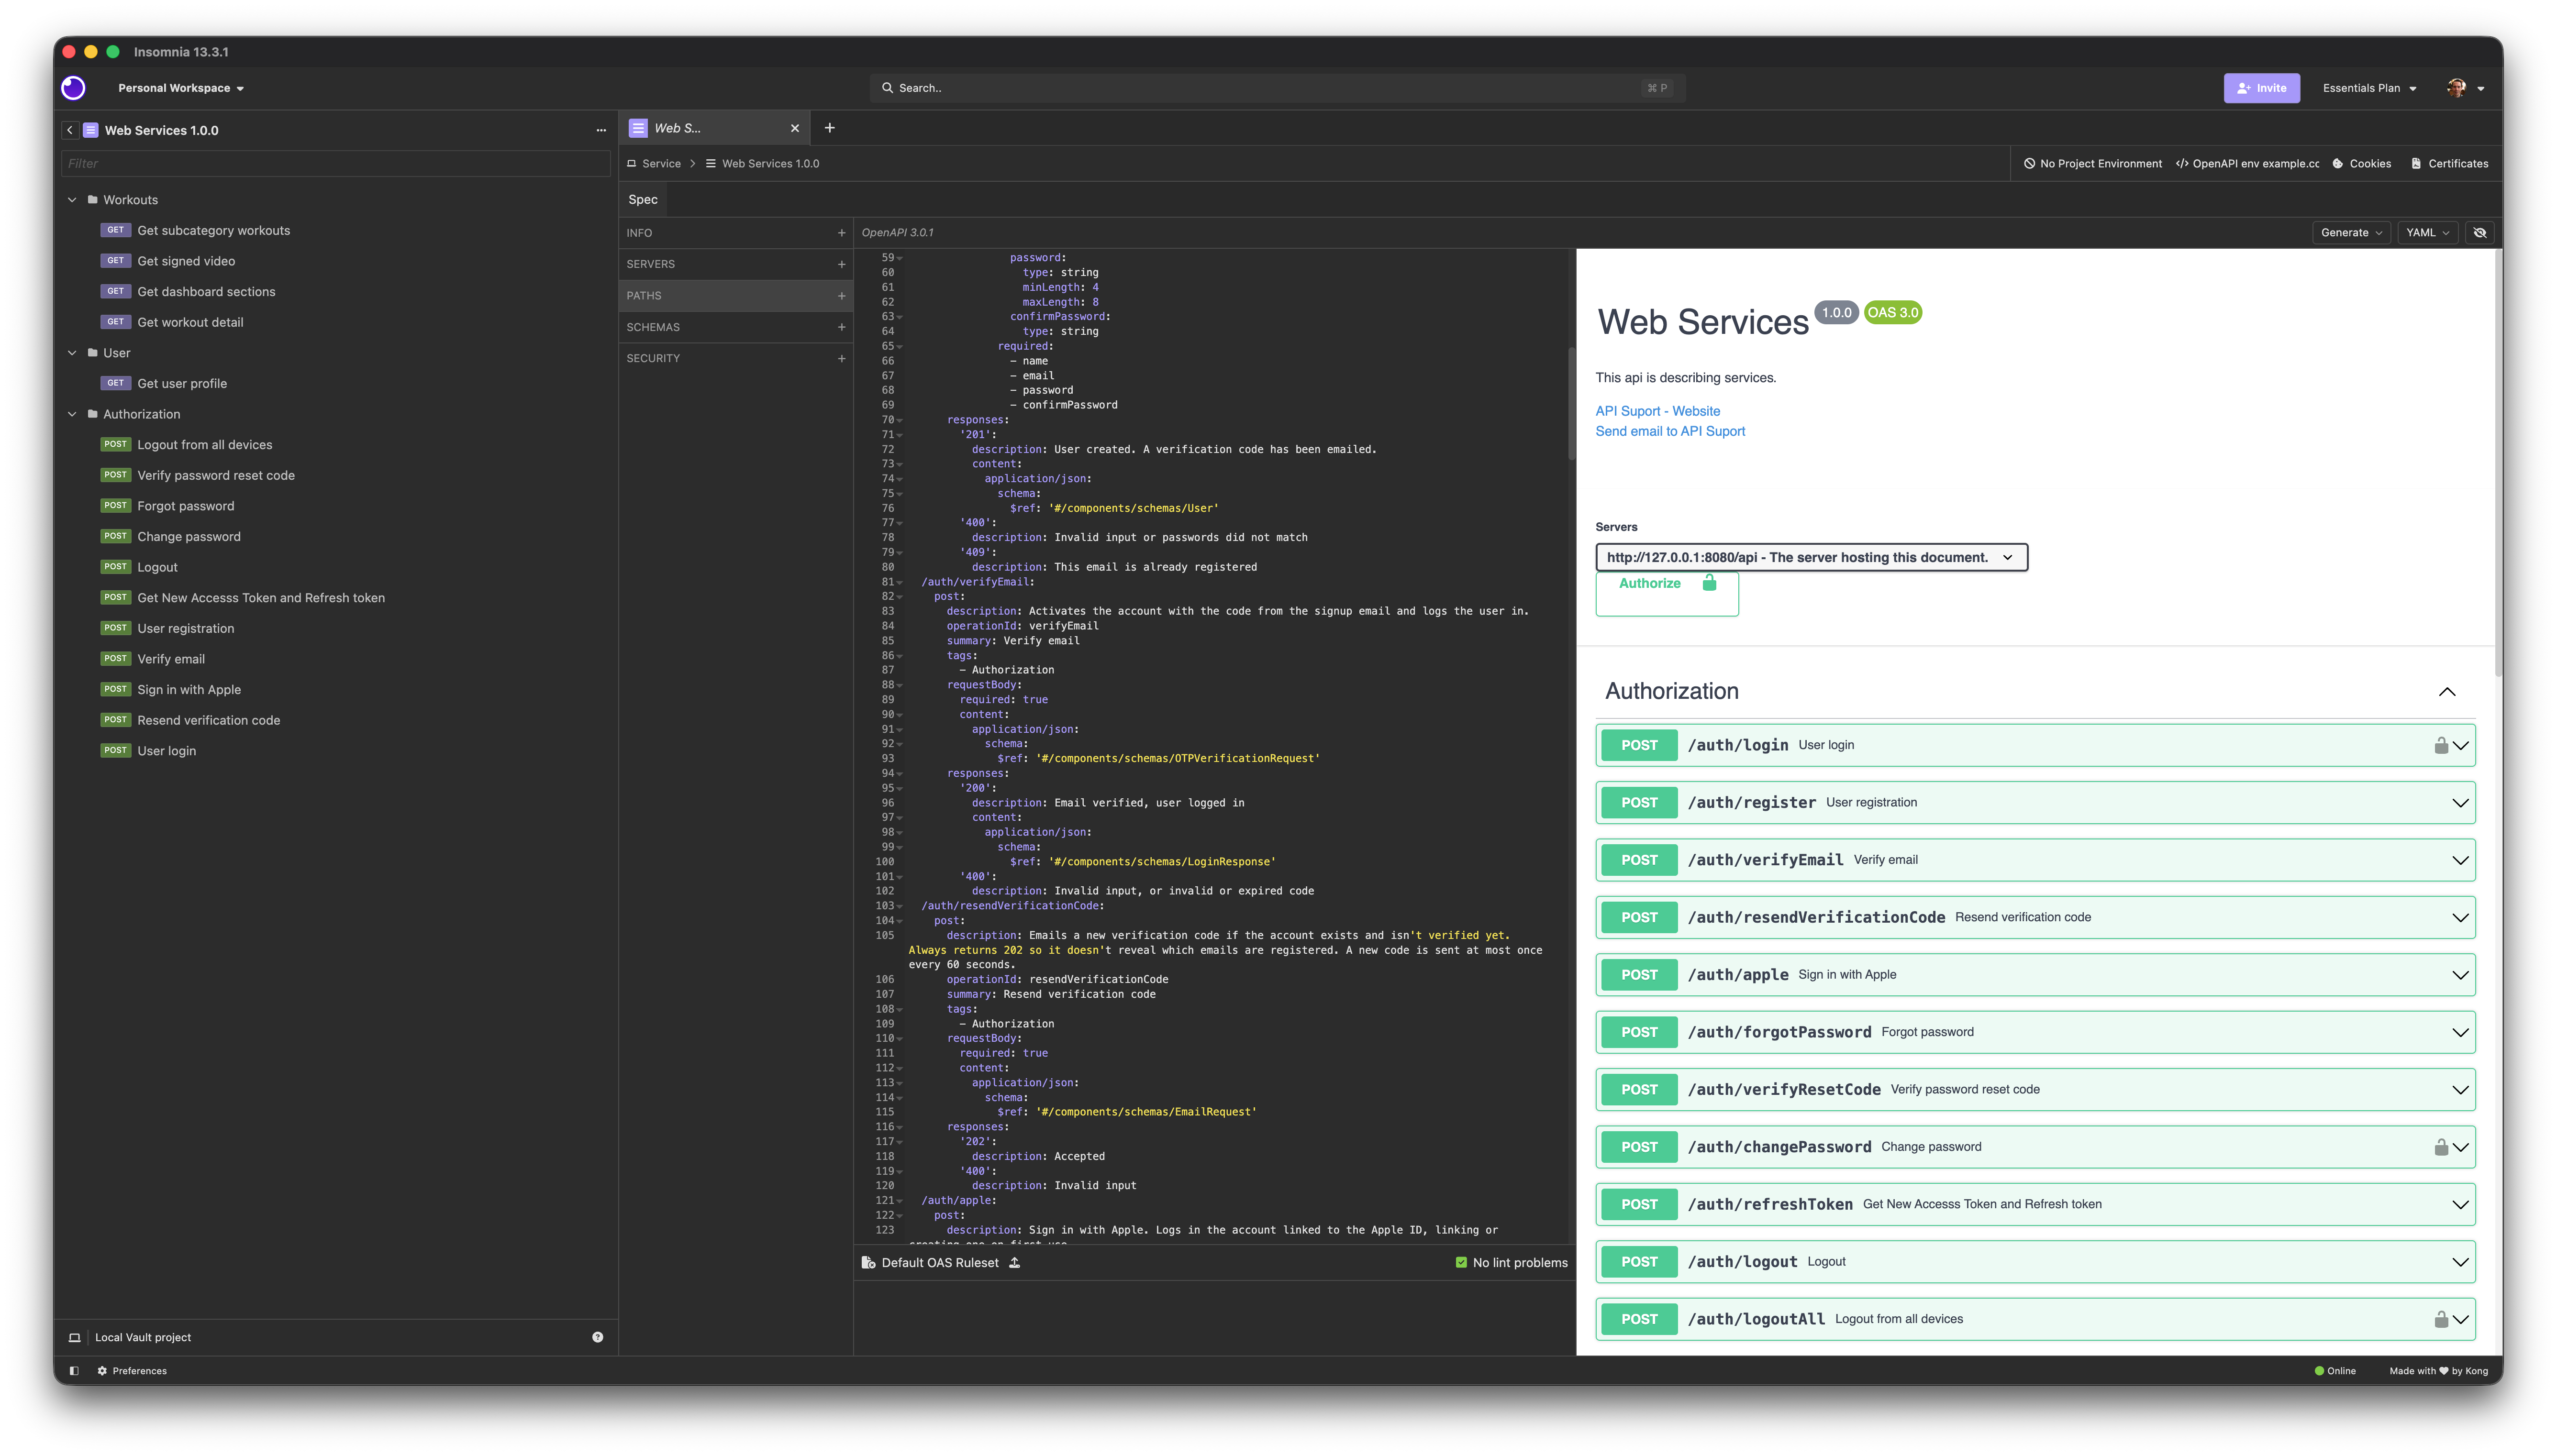
The spec in Insomnia: the generated request collection (left), the YAML source (middle) and the rendered documentation (right).
Signup flow
Signing up takes two requests. The first creates the account, and the second proves the user owns the email address. Until that second step succeeds, the account exists but can’t log in.
iOS app                     AuthService                 NotificationService
   │  POST /auth/register      │                               │
   │  {name, email, password}─▶│ create user (unverified)      │
   │                           │ save Bcrypt(code) ───────────▶│ email 6-digit code
   │◀──────────────── 201      │                               │
   │                           │                               │
   │  POST /auth/verifyEmail   │                               │
   │  {email, code} ──────────▶│ check code, mark verified     │
   │◀── {user, accessToken,    │ delete code                   │
   │     refreshToken}         │                               │
1. Register
POST /auth/register validates the input, hashes the password with Bcrypt and saves the user with isEmailVerified = false. It then asks NotificationService to email a six-digit code.
@Sendable func signUp(req: Request) async throws -> Response {
    try User.Create.validate(content: req)
    let create = try req.content.decode(User.Create.self)
    guard create.password == create.confirmPassword else {
        throw Abort(.badRequest, reason: "Passwords did not match")
    }

    let user = try User(name: create.name,
                        email: create.email,
                        passwordHash: Bcrypt.hash(create.password))
    try await user.save(on: req.db)

    try await req.otp.issue(for: user, purpose: .emailVerification)

    let response = Response(status: .created)
    try response.content.encode(user.toPublic())   // never the model itself
    return response
}
Two details are worth pointing out:
- The response uses
toPublic(). Fluent models conform toContent, so encoding theUsermodel directly would also send itspassword_hashto the client. - Abandoned signups can be resumed. If the user closes the app before entering the code and signs up again with the same email and password, the handler reuses the unverified account and sends a new code instead of returning
409 Conflict. The password has to match, so nobody else can take over a pending account.
2. The verification code
Codes are only six digits, so a fast hash like SHA-256 could be reversed by trying all one million values. The code is therefore stored as a Bcrypt hash, like a password, and it expires after 10 minutes.
The code service adds a few limits:
- One code per user and purpose. Issuing a new code replaces the old one.
- 60-second cooldown between emails, so the endpoint can’t be used to flood an inbox.
- Five wrong guesses and the code is deleted. The user has to request a new one.
- One error message for every failure. “Unknown email”, “wrong code” and “expired code” all return
400 Invalid or expired code, so a caller can’t find out which emails are registered.
If the user didn’t get the email, POST /auth/resendVerificationCode sends a new code. It always answers 202 Accepted, whether or not the email exists, for the same reason.
3. Verify and sign in
POST /auth/verifyEmail checks the code, marks the user as verified and deletes the code in one transaction. It then returns the same response as a login, so the user is signed in straight away instead of having to type the password they chose a few seconds earlier.
@Sendable func verifyEmail(req: Request) async throws -> LoginResponseDTO {
    try OTPVerificationDTO.validate(content: req)
    let body = try req.content.decode(OTPVerificationDTO.self)

    let otp = try await req.otp.verify(code: body.code, email: body.email,
                                       purpose: .emailVerification)
    let user = otp.user
    user.isEmailVerified = true
    try await req.db.transaction { db in
        try await user.save(on: db)
        try await otp.delete(on: db)
    }
    return try await makeLoginResponse(for: user, req: req)
}
If an unverified user tries to log in with a password, the login endpoint answers 403 Forbidden instead of 401 Unauthorized. The different status code tells the app to show the verification screen instead of “wrong password”.
On the iOS side
The verification screen draws six digit boxes over one hidden TextField with .textContentType(.oneTimeCode). Six separate text fields would break pasting and the iOS keyboard’s “From Mail” code suggestion. The “Resend code” button also waits 60 seconds, matching the server’s cooldown.
Here is the whole flow in the app, from the Sign Up sheet to the dashboard:
Login flow
Once the email is verified, the user can sign in with their email and password. Login returns the same two tokens as the end of signup: a short-lived access token and a long-lived refresh token.
iOS app                               AuthService
   │  POST /auth/login                   │
   │  Authorization: Basic base64(email:password)
   │ ───────────────────────────────────▶│ find user by email, check Bcrypt hash
   │                                     │ email verified? (403 if not)
   │                                     │ sign access token, store refresh token hash
   │◀── {user, accessToken, refreshToken, expireDate}
1. Checking the password with HTTP Basic
The credentials travel in a standard Authorization: Basic header instead of a JSON body. Vapor’s Fluent integration already knows how to handle it: the User model conforms to ModelAuthenticatable and tells Fluent which fields hold the username and the password hash.
extension User: ModelAuthenticatable {
    public static var usernameKey: KeyPath<User, Field<String>> { \User.$email }
    public static var passwordHashKey: KeyPath<User, Field<String>> { \User.$passwordHash }

    public func verify(password: String) throws -> Bool {
        try Bcrypt.verify(password, created: self.passwordHash)
    }
}
Adding User.authenticator() to the login route is then enough. It reads the header, loads the user by email, checks the Bcrypt hash and, if everything matches, logs the user in for this request. The handler itself only checks that the email has been verified:
routes.grouped(User.authenticator())
    .post("login", use: login(req:))

@Sendable func login(req: Request) async throws -> LoginResponseDTO {
    let user = try req.auth.require(User.self)    // 401 if the authenticator failed
    guard user.isEmailVerified else {
        // Distinct from 401 so the app can route the user to the OTP screen.
        throw Abort(.forbidden, reason: "Email is not verified")
    }
    return try await makeLoginResponse(for: user, req: req)
}
2. Issuing the tokens
Login, email verification and Sign in with Apple all end in the same helper, so every way of signing in produces the same response:
private func makeLoginResponse(for user: User, req: Request) async throws -> LoginResponseDTO {
    // Housekeeping: drop this user's expired refresh tokens.
    try await UserToken.query(on: req.db)
        .filter(\.$user.$id == user.requireID())
        .filter(\.$expiredAt <= Date())
        .delete()

    let accessToken = try await user.generateToken(req: req)
    let refreshToken = try user.generateRefreshToken(req: req)
    try await refreshToken.model.save(on: req.db)     // stores only the hash

    return LoginResponseDTO(user: user.toPublic(),
                            token: TokenResponseDTO(accessToken: accessToken.0,
                                                    refreshToken: refreshToken.rawToken,
                                                    expireDate: accessToken.1))
}
The two tokens have different jobs:
| Access token | Refresh token | |
|---|---|---|
| What it is | A signed JWT (ES256) | 40 random characters |
| Lifetime | 15 minutes | 30 days |
| Sent with | Every protected request, as Bearer | Only to /auth/refreshToken |
| Stored on the server | Not at all | Only its SHA-256 hash |
The access token’s payload carries the user id and role, so ContentDeliveryEngine can authorize a request just by checking the signature, without asking AuthService or the database. The price is that an access token can’t be revoked before it expires, which is why it only lives for 15 minutes. The refresh token is the opposite: it is checked against the database every time, so it can be revoked at any moment.
The server never stores the raw refresh token, only its hash. If the database leaked, the stored values would be useless for signing in.
On the iOS side
The app builds the Basic header and passes it to the generated client through the AuthenticationMiddleware from Apple’s OpenAPI runtime:
let basic = Data("\(email):\(password)".utf8).base64EncodedString()
let client = Client(serverURL: try Servers.server2(),
                    transport: URLSessionTransport(),
                    middlewares: [AuthenticationMiddleware(
                        authorizationHeaderFieldValue: "Basic \(basic)")])
let response = try await client.login()
On success, UserSession stores both tokens in the Keychain and flips isAuthenticated. The root view observes that flag, so the sign-in sheet closes and the dashboard appears without any explicit navigation code. On the next launch, the tokens are read back from the Keychain before the first frame is drawn, so a signed-in user goes straight to the dashboard.
Here is the login flow in the app: